
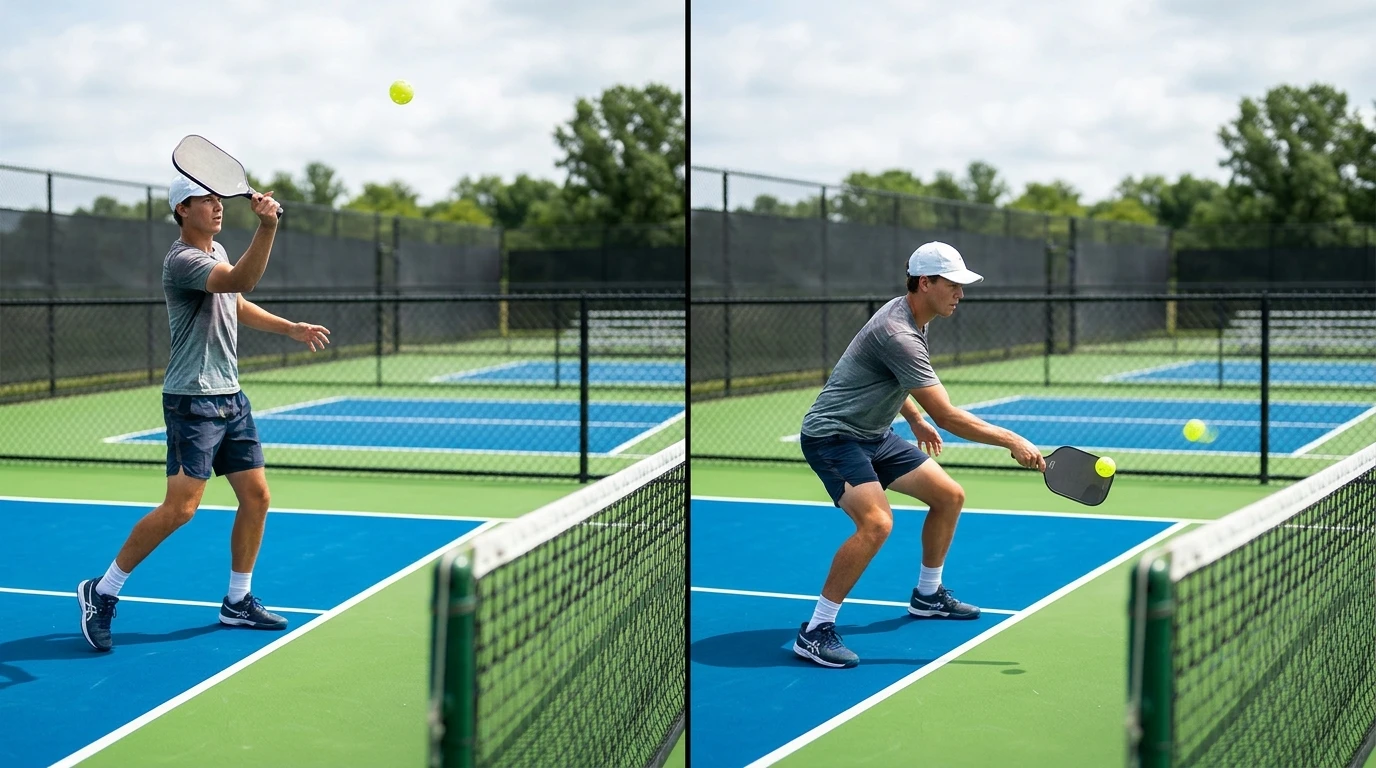
If you want to know how to hit a third shot drop in pickleball, start by finding out why yours fails. A drop that pops up gets punished by the team at the kitchen line. A drop that hits the net hands them a free point. Most players treat both as one problem called “bad touch,” but they come from five separate faults, and each has its own fix.
This article covers those five faults from the baseline, one at a time. For each you get what goes wrong, one fix, and one drill. Work out which fault is yours before you change anything, because fixing the wrong one can make the drop worse.
What a good third shot drop looks like on the court
A good drop clears the net by a small margin, peaks on your side of the net or right at it, and lands in the kitchen close to the net. Because it comes down steeply and short, your opponents have to hit it upward from low in their stance. That gives you time to walk forward.
Watch the ball after you hit it. If it is still rising when it crosses the net, it will sit up for the opponent. If it crosses flat and fast, it will bounce deep and get driven back at you. If it dips into the tape, you have lost the point before they touch it.
Keep this picture in mind for every fault below. Each one breaks a different part of that flight.
Fault 1: You contact the ball too late and too far in front of your body
There are two versions of this fault. In the first, you let the ball drop past your hip or knee and then scoop it. In the second, you lunge at the ball with your arm fully extended. Both take away your control, because you cannot see the ball and the paddle together and you cannot swing smoothly.
The contact point you want is in front of your lead hip at roughly waist height, with your elbow bent and your paddle where your eyes can follow it.
The fix: Move your feet before you swing. Recover to a balanced stance as soon as your opponent hits, then take small adjusting steps so the ball arrives in front of you instead of beside you. A well-timed split step as the opponent makes contact gets you moving in the right direction sooner.
The drill: Stand at the baseline and drop a ball onto the court in front of your lead foot. Let it bounce and hit a drop toward the kitchen. Repeat 15 times, adjusting your position so contact lands in the same place every time. Once that feels consistent, ask a partner to feed you balls from the other side so you practice getting your feet there under real timing.
Fault 2: Your paddle face is open and your wrist is doing the work
Many players create the lift by tilting the paddle face up and flicking the wrist. This works only when the timing is perfect. A fraction early and the ball goes into the net. A fraction late and it flies long or pops up.
A steady paddle face removes that variable. The face should be only slightly open, and it should stay the same angle through the contact.
The fix: Loosen your grip so the paddle does not feel tight in your hand, then keep your wrist firm. Let your shoulder and elbow swing the paddle in a short, low-to-high path, and finish with the paddle pointing at your target. If your paddle tip flips upward after contact, your wrist is working.
The drill: Hit 20 drops in a row and freeze your finish position each time. Check two things: the paddle tip points toward where the ball should land, and your wrist angle has not changed. If you can feel the wrist flicking, shorten your swing and slow it down until the finish looks the same on every ball.
Fault 3: You lift with your arm instead of your legs
A third shot drop is a soft shot, but it still needs energy to carry the ball over the net from the baseline. If your legs do not supply that energy, your arm will, and an arm swing is hard to repeat. You end up with a shot that sometimes lands deep and sometimes drops short.
If you often stand tall and reach, this is likely your fault. Your body stays high, you cannot get under the ball, and your arm has to guess how much power to add.
The fix: Bend your knees early and stay low through the shot. Start the movement from your legs: sink as the ball approaches, then rise gently through contact. Your arm only guides the paddle along its path. The power should feel like it comes from straightening your legs, not from swinging harder.
The drill: Have a partner feed you balls from the kitchen line, or drop-feed them yourself. Say “down” as the ball bounces and “up” as you make contact. After 15 repetitions, try it again without saying the words. The sink-and-rise rhythm should start to feel automatic, and your arm should feel quieter.
Fault 4: Your arc is too flat or too high over the net
This fault shows in where the ball crosses the net. A flat drop crosses just above the tape. It looks safe, but any small error puts it in the net, and when it clears it bounces deep. A very high drop is easy to control, but it gives your opponent time to step in, take the ball out of the air, and attack.
Aim for the middle: the ball rises, peaks around the net, and falls into the kitchen.
The fix: Choose a landing spot, not just a direction. Pick a target a couple of feet in front of the kitchen line, on the opposing side, and hit toward it. Then adjust: if balls hit the net, aim slightly higher on your next one. If they sit up, shorten the swing and aim lower.
The drill: Place a target (a towel or cone) in the opposing kitchen. Hit 20 drops from the baseline and count how many land in the kitchen. Then repeat from the other side of the court. Your goal is to see the same arc each time. If you have a partner, ask them to stand at the kitchen line and tell you whether the ball peaked before or after the net.
Fault 5: You drop when you should drive, and how to read the return
Sometimes the drop is not the problem; the choice to hit it is. If the return comes to you high and fast, trying to drop it requires a large change of pace that few players can execute. Rushing the shot also makes you set up poorly: you hit before your feet are ready, then lunge toward the kitchen before the ball has landed.
Read the ball before you decide:
- Deep and low return: The drop is a good choice. Your opponents are far back, so you can get set and hit softly.
- Return that bounces high near your waist or shoulder: This ball is attackable. A firm drive through the middle often works better than a drop.
- Return that lands short: You are being pulled forward, so a drop is difficult. Slow down and consider a soft, deliberate reset.
The fix: Decide before the ball bounces, and stay behind the baseline until your drop has landed. Move forward only after you see where the ball goes.
The drill: Have a partner feed mixed balls, some deep, some short, some high. Call “drop” or “drive” out loud before each ball bounces. After a few minutes, your partner can tell you whether your choice matched the ball.
A 20-minute solo and partner practice routine for the drop
You can fit this into a short session. Adjust the time per block based on your weakest fault.
- Minutes 0 to 5, contact point (solo): Drop-and-hit from the baseline, 15 to 20 balls, landing contact in front of your lead foot each time.
- Minutes 5 to 10, paddle face and legs (solo or partner): Hit drops with a frozen finish, then add the “down and up” leg rhythm.
- Minutes 10 to 15, arc (partner or target): Hit toward a target in the kitchen and count landings. If you want a more structured way to score your placement, the target box training article shows how to set up landing zones.
- Minutes 15 to 20, decision (partner): Mixed feeds, calling “drop” or “drive” before each bounce.
Track your results for each block, such as how many of 20 landed in the kitchen. A simple number tells you which fault is improving and which still needs work.
How to use your drop in live games, and when to reset instead
In a game, you will not hit a perfect drop every time, and you do not need to. What matters is hitting a reasonable drop often enough that you can move to the kitchen line without being attacked.
Advance only when the ball has landed in the kitchen and your opponent is reaching up to hit it. If your drop pops up, do not advance. Stay back, get ready, and reset with a soft shot aimed at your opponent’s feet. Moving forward into an attack is how a poor third shot turns into a lost point.
If you do get attacked at the line, your volley skills decide whether you can block the ball back. Even so, aim to keep the drop as consistent as possible so you spend more time dinking than defending.
When you are unsure, treat the drop as one option, not an obligation. A deep, controlled drive or a careful reset beats a forced drop that hangs in the air.
Your next step
Pick one of the five faults, run its drill in your next practice session, then read the Pickleball Dinking Drills guide to build the soft touch you need at the kitchen line.